


Canning Fresh Corn at Home
- Marie Overton

- Sep 18, 2025
- 4 min read
Updated: Sep 20, 2025
Canning fresh corn is a great way to enjoy the sweet crunch of summer all year long. If you've harvested a fantastic crop from your garden or snagged a deal at your local farmer's market, you can turn that surplus into something delightful. Canning corn not only extends its shelf life but preserves its fresh taste and texture. In this guide, we’ll cover everything you need to know for a successful canning experience—from selecting the perfect corn to sealing those jars for safe storage.
Why Can Fresh Corn?
Canning fresh corn lets you savor the taste of summer even during the coldest months. It is also a smart way to reduce food waste and save money. For instance, home-canned corn saves you up to 30% compared to store-bought varieties, especially during off-seasons. Additionally, unlike many store-bought options that may contain preservatives and additives, your home-canned corn will be pure, wholesome, and customizable to your taste.
Selecting the Right Corn
Choosing the right corn is crucial for a great final product. Sweet corn is ideal for canning. Here’s what to look for:
Select ears that are plump, with bright green husks and moist silk, indicative of freshness.
The kernels should feel milky and tender when pressed; these are signs of perfect ripeness.
Avoid any corn with drying husks or dark spots, as these could indicate spoilage.
To ensure the best quality, consider picking corn in the morning when the sugars are at their peak.
Preparing Your Equipment
Getting your equipment ready is essential for a smooth canning session. Gather these supplies:
Canning jars: pint jars are a little more functional for most families.
Lids and bands: Use new lids to ensure a proper seal, and check that bands are in good condition.
Pressure canner: This is critical as corn must be pressure-canned for safety.
Mandolin: Use this set at 1/4 inch for cutting the kernels off the cob.
Jar lifter: This will safely help you handle hot jars from the canner.
Cutting the Kernels

Cut the kernels off the cob. Use this straightforward method:
Use a sharp knife or a mandolin to cut down the sides of the cob to remove the kernels, being careful not to cut too deeply into the cob itself.
Gather the kernels into a bowl as you work, ensuring a clean and quick process.
Filling the Jars
With your corn ready, let’s fill the jars:
Pack the corn kernels into the jars, allowing 1 inch of headspace for expansion during processing.
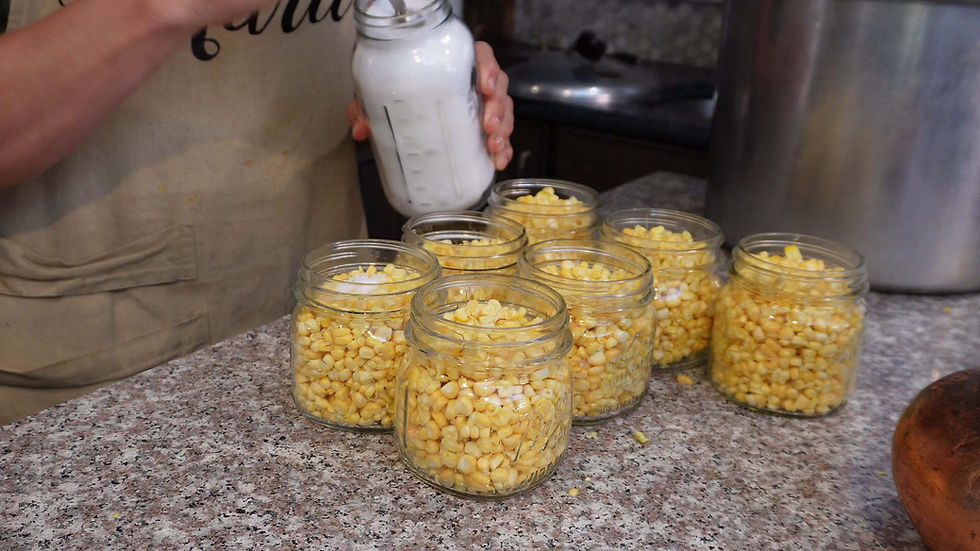
Add 1/2 teaspoon of salt per pint jar.

Pour boiling water into each jar until the corn is fully submerged, maintaining the headspace.
Eliminate air bubbles by sliding a wooden chop stick around the inside of the jar.
Clean the rim of the jars with a cloth to ensure a good seal.
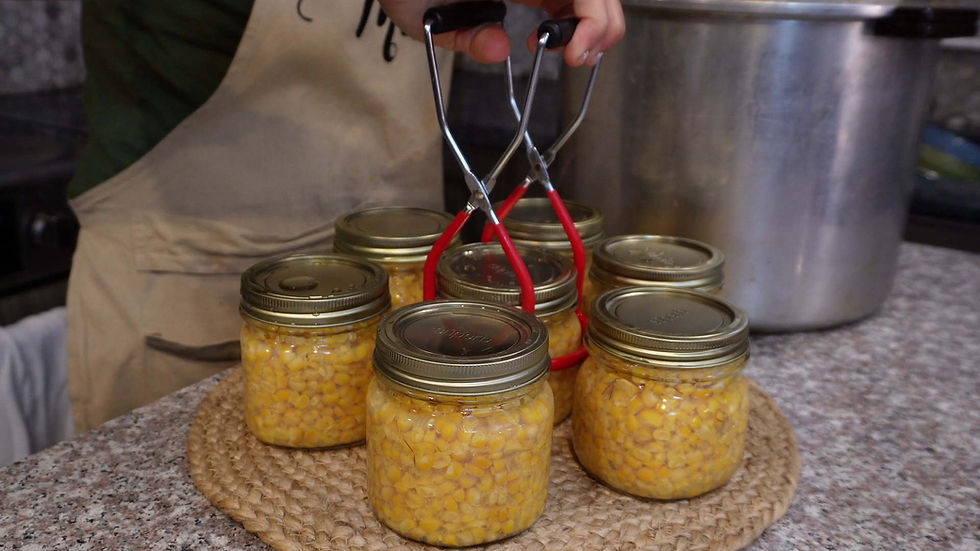
Secure the lids on the jars and screw on the bands until they are snug but not overly tight.
(For quality, American made Superb canning lids and jars follow this link and use the coupon code WP20 to get 20% off your purchase.)
Processing the Jars
Proper pressure canning is key for safety. Follow these steps:

Add hot water to the pressure canner according to the manufacturer’s guidelines. (Usually 3 quarts)
Position the jars inside the canner.
Seal the lid of the canner, and heat it on high until steam escapes from the vent. Allow it to vent for 10 minutes
Process at 10 pounds of pressure for 55 minutes if you are at sea level. If you need to know how altitude affects the amount of time you process your jars check out my canning basics video/post.

Turn off the heat, and let the canner cool naturally before you remove the lid.
Cooling and Storing the Jars
After processing, follow these steps to cool the jars:
After processing, allow to cool in the pressure canner with the heat off and the lid removed for 10 minutes.
At the end of the cooling time, carefully remove the jars and place them on a heat resistant surface about 1-2 inches apart.
Allow the jars to cool completely for 24 hours. You might hear a popping sound as the lids seal.
Check the seals by pressing down in the center of each lid. If it pops back, it hasn’t sealed properly.
Label each jar with the date and contents, and store them in a cool, dry, dark place. Properly sealed jars can last up to 3 years.

Tips for Success
Opt for fresh corn: Using the freshest corn greatly benefits flavor and texture after canning.
Always follow safety rules: Use a pressure canner for low-acid foods like corn to prevent foodborne illnesses.
Add personal touches: Feel free to mix in spices, herbs, or even a pinch of sugar or salt for a unique flavor twist.
Final Thoughts
Canning fresh corn at home is a simple and fulfilling activity. With just a few easy steps, you can turn the sweet, crunchy flavors of summer into jars of goodness that can be enjoyed all year long. It’s a great way to make use of a bountiful harvest or a great sale at the market.


Comments